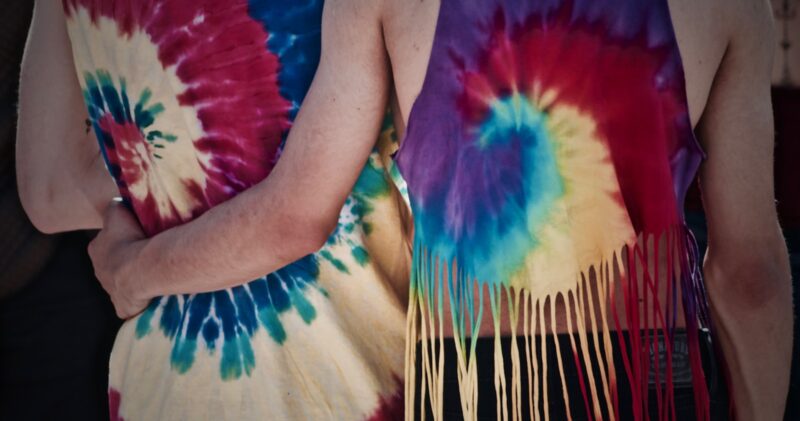
Tie-dye t-shirts are a well-known symbol of defiance. Whether preparing for your initial creation or trying to steer clear of typical errors, you are entering into a vibrant adventure, becoming proficient in the craft of tie-dye digital printing. Through grasping the fundamentals and experimenting with new methods, you will discover how to reveal vibrant colors on the fabric.
Roll your sleeves up. It is time to explore the colorful world of tie-dye, where surprises are always around every corner.
Understanding the basics of tie-dye printing
The first step towards mastering the best practices for tie-dye printing is understanding the process. It’s simple, really. The magic of tie dyes often lies in folding, twisting, pleating, or crumpling fabric, binding it with string or rubber bands, and then applying dye. It creates an excitingly unpredictable pattern.
But the charm of tie-dye printing doesn’t stop there. It’s also about your chosen color patterns and how they blend and contrast. Remember, it’s art, it’s a craft, and it’s a science. So don’t be afraid to experiment and be creative.
Selecting the perfect materials for tie-dye
When picking suitable fabrics for your custom t-shirt project, it’s crucial to remember that natural fibers like cotton, silk, and linen absorb dye the best.
On the other hand, synthetic fiber tie-dye tees won’t produce the same vivid patterns and do not absorb printing ink well. So, if you want to create custom tie-dye shirts for a screen printing masterpiece, you can’t go wrong with natural fibers.
Mastering the best practices in tie-dye shirt printing involves printing techniques and the right material choice in the tie-die shirt-making process.
Preparing your fabric for maximum color absorption
Before you dive into the world of vibrant patterns, it’s essential to prep your fabric correctly to ensure maximum color absorption. Start by soaking your fabric in soda ash. This sodium carbonate solution modifies the pH levels of your fabric, allowing the dye to bond more efficiently, resulting in brighter, longer-lasting colors.
After soaking, don’t rush to apply the dye. Instead, wring out the fabric thoroughly to remove excess soda ash water. This step is crucial to preventing diluting your dye and ensuring the dye penetrates deep into the fibers.
Now, you’re all set to start creating your rainbow casual wear masterpiece.
Exploring different tie-dye techniques and patterns
Now that your fabric’s prepped, it’s time to explore various tie-dye techniques and bold patterns to make your tie-dyeing designs pop. You might start with the classic spiral top method: pinch a point in the fabric, twist it, and then tightly bind it.
Or perhaps you’re drawn to Shibori, a Japanese technique that involves folding, twisting, or bunching clothing and binding it before dyeing. There’s also the bullseye, a favorite among kids, where you gather your fabric into a tube and bind it at intervals.
Whatever tie-dye patterns and methods you choose, always apply dye sparingly at first. You can add more, but you can’t take it away. And remember, practice makes perfect, so don’t be afraid to experiment.
The art of applying dye for vivid results
When it comes to tie-dye printing, precision is vital. Pour your chosen dye into a squeeze bottle for better control. Start applying dye from the center of your twist or fold, working outward in a circular motion. It ensures your hues are deep and vibrant, not muddy.
Don’t rush. Let each color soak in before applying the next. Lastly, thoroughly rinse your masterpiece under cold water until the runoff is clear. This seals in your colors, making them pop.
Do’s and don’ts on setting the dye
Setting the dye is crucial, and you must be aware of certain do’s and don’ts to prevent your bright colors and prints from fading.
When involved in tie-dye printing, always remember to rinse your creation in cold water before untying it. It helps set the dye and prevents the colors from bleeding into each other. Don’t rush to wash your masterpiece. Allow the dye to set for at least 24 hours before washing excess dye.
A major don’t is to avoid using hot water. It can cause your colors to fade rapidly. Also, don’t use harsh detergents when washing. Always opt for gentle, dye-friendly soaps.
Cleaning and caring for your tie-dyed items
After all your hard work and patience, it’s essential to know how to properly clean and care for your colorful creations to keep them looking their best.
Don’t just toss your tie-dye shirts together with the rest of your laundry. They require special attention. Always wash them separately for the first few times. Cold is best. It helps to prevent the vibrant colors from bleeding onto other garments.
For drying, avoid high heat, as it can cause prints to fade. Instead, opt for air drying or tumble dry on low. When ironing, wear your shirts and hats inside out to protect the eye-catching patterns and prints.
Common mistakes and how to avoid them
Mistakes are common when starting with this kind of fabric printing, but knowing what to avoid can save you a lot of grief.
One common mistake isn’t pre-washing the fabric. It’s crucial to remove any finishes that may resist the dye. In tie-dye printing, timing is everything. Leaving the dye on too long can result in muddy colors. You shouldn’t rush the rinsing, washing, and printing processes.
Another pitfall is using the wrong type of dye. For best practices, stick to fiber-reactive dyes for cotton. Lastly, be patient and allow the magic of tie-dye to unfold. Remember, it’s a craft of fun surprises, and every piece you create is uniquely yours.
Last words
So, you’re now a step closer to mastering the vibrant world of tie-dye background printing. But remember, this journey doesn’t stop here. What awaits? Could there be more intricate patterns or an ingenious tie-dye pattern out there? Keep exploring and experimenting. It’s time to dive deeper, push boundaries, and create custom tie-dye off-dye pieces that are truly, uniquely yours.


