
If you are using Gboard, then Gboard might keep stopping once in a while due to sort of technical issues. If you want to get rid of Gboard keeps stopping error, then you can try the following mentioned methods. All the process is simple, short & easy to use. It will troubleshoot your Gboard keeps stopping error within minutes. So, mainly this article consists of a few lines about Gboard and then various methods to fix the Gboard keeps stopping error.
What Is Gboard?
Gboard is an inbuilt virtual keyboard that comes up with glide typing, voice typing, emoji search, GIFs, stickers, floating keyboard, predictive text, and many more. It developed by Google and accessible to both devices Android as well as iOS. Gboard also presents offline voice recognition, handwriting & multilingual language support.
It smoothly consolidates with Google resources like translate, maps, searches, and so on, which it makes to connect with a mobile display and mini keyboard comfortably and trouble-free. Also, you can discover weather, sports, news headlines, latest movies & web series just by hitting the toolbar above your Gboard which directs you to Google Windows.
What if your Gboard stops working suddenly? Do your Gboard keeps stopping? Sadly! It might occur due to many reasons like app glitch, bad cache or variable complications in the device itself. Gboard control panel can manifest collective errors subsequently to system failure together with “Can’t use a keyboard” or “Gboard error” which means you might be unable to unlock your phone also.

So, are you looking for how to fix the Gboard keeps stopping the error? Then you are reading the right article. In this post, I am going to explain the different methods to fix the Gboard stopping error for both Android and iOS.
Let’s dive right into it.
Different Methods To Fix Gboard Keeps Stopping Error For Android
You can clear the cache and worthless data or restore the Gboard app. If trouble goes on, then try out the following methods listed below to fix the keyboard error and put a stop to crashing.
Variant approach to fix Gboard stopping error for Android phones and tablet
If a keyboard is not functioning well in your Android phone, then you can go along with the stated strategy to sort out the difficulty.
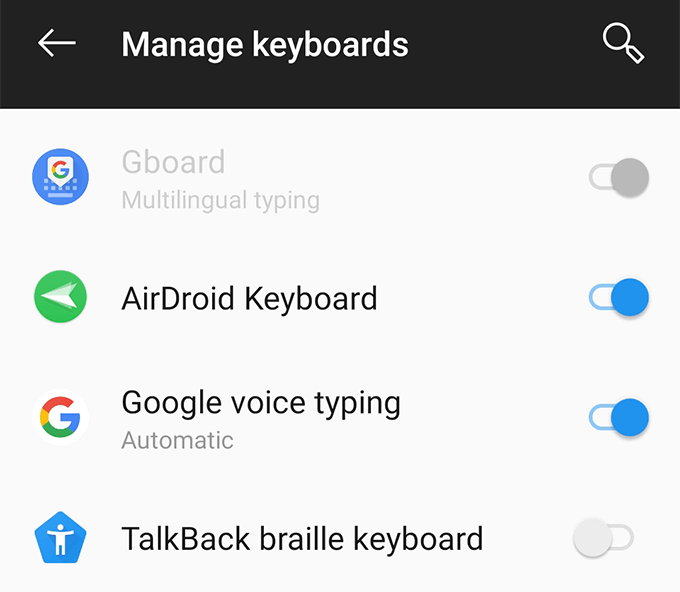
1. Deactivate all other keyboards-
Android serves with various keyboard authorized on your mobile so that you can alter it according to your preference. Although, it can give rise to a couple of hurdles that consequence in the non-functioning of the keyboard. By deactivating all the keyboards beside Gboard could debug the errors.
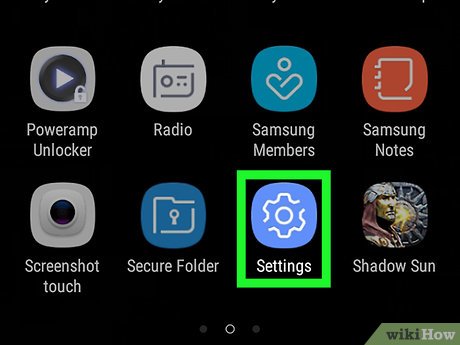
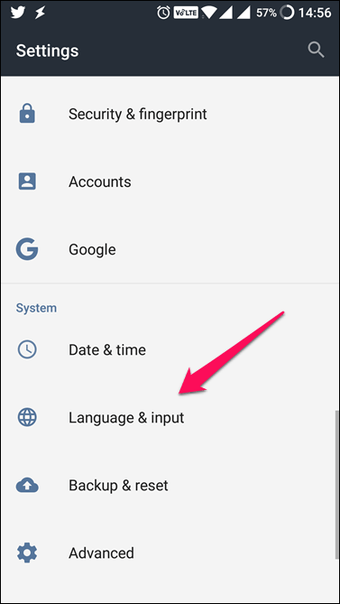
Step1: First of all, go to your phone “Settings” and select “System options”.
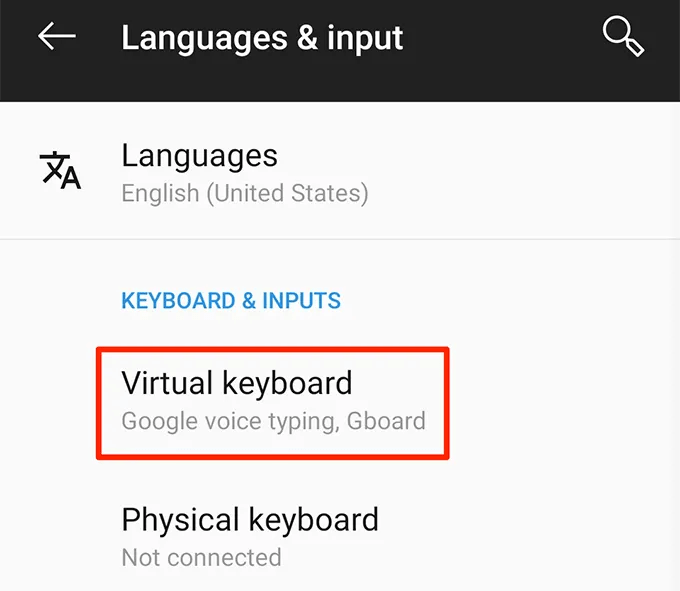
Step 2: Then, click on the “Languages & input” on your mobile and hit on “Virtual keyboard” or “Current keyboard” option.
Step 3: Go along with the “Manage keyboard” displayed on the screen.

Step 4: Flip the buttons for all keyboards excluding the Gboard remaining as in the off state.

2. Set Gboard as the default keyboard-
If the keyboard is not your primary keyboard, then it is essential to set the Gboard as the default keyboard to fix the error.
Step 1: First and foremost, go to “Settings” and select “Languages & input” and hit on “Keyboard and input method”.
Step 2: Now the keyboard section will open and click on the “Current keyboard”.
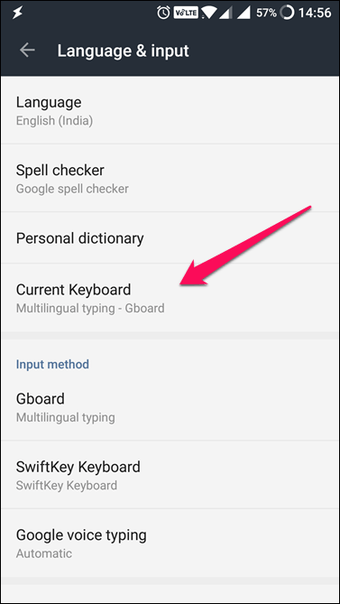
Step 3: After clicking it, the “Default keyboard” option will pop up where you can set Gboard as the default keyboard.

3. Reboot your phone-
A rapid reboot may fix the Gboard crashing problem in almost all Android and iOS users.
Step 1: Firstly push and hold the power button.
Step 2: Hit the power off button.
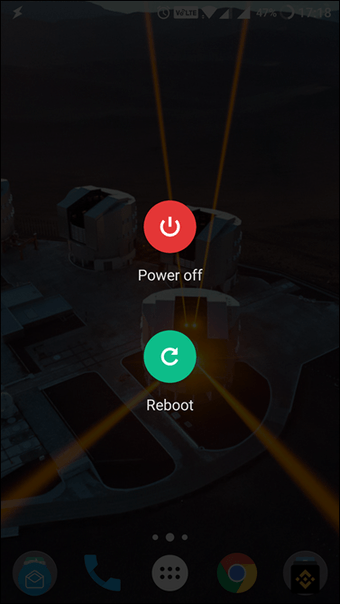
Step 3: After a few minutes restart the phone and verify whether the Gboard issue gets fixed or not.
4. Clear the app cache-
Cache permits your app to act quick and fast by collecting and preserving the memory of recently used apps and programs for future use. By deleting the Gboard cache, it will eliminate the respective data and files that might be the reason for the Gboard error. To do so-
Step 1: Firstly, go to the “Settings” of your phone and select “Apps & Notifications” and tap on Gboard.
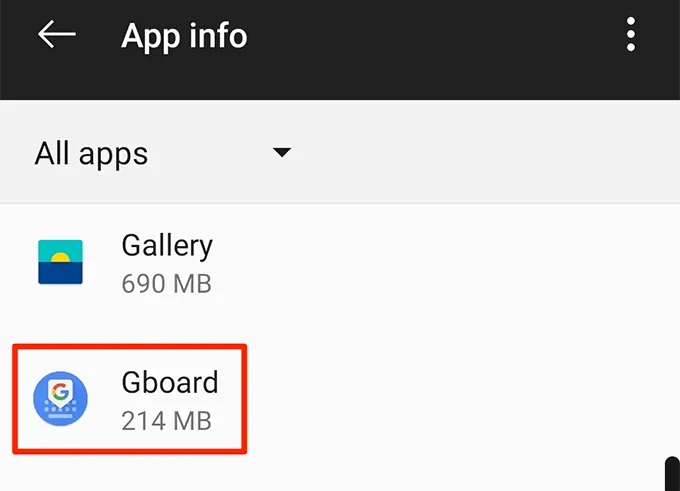
Step 2: Afterwards, click on “Storage” and hit on “Clear cache”.
![]()
Step 3: A permission box will open where you have to approve clearing cache data. Then, select the “Ok” button.
5. Update your Gboard and Android phone-
1. To update the Gboard
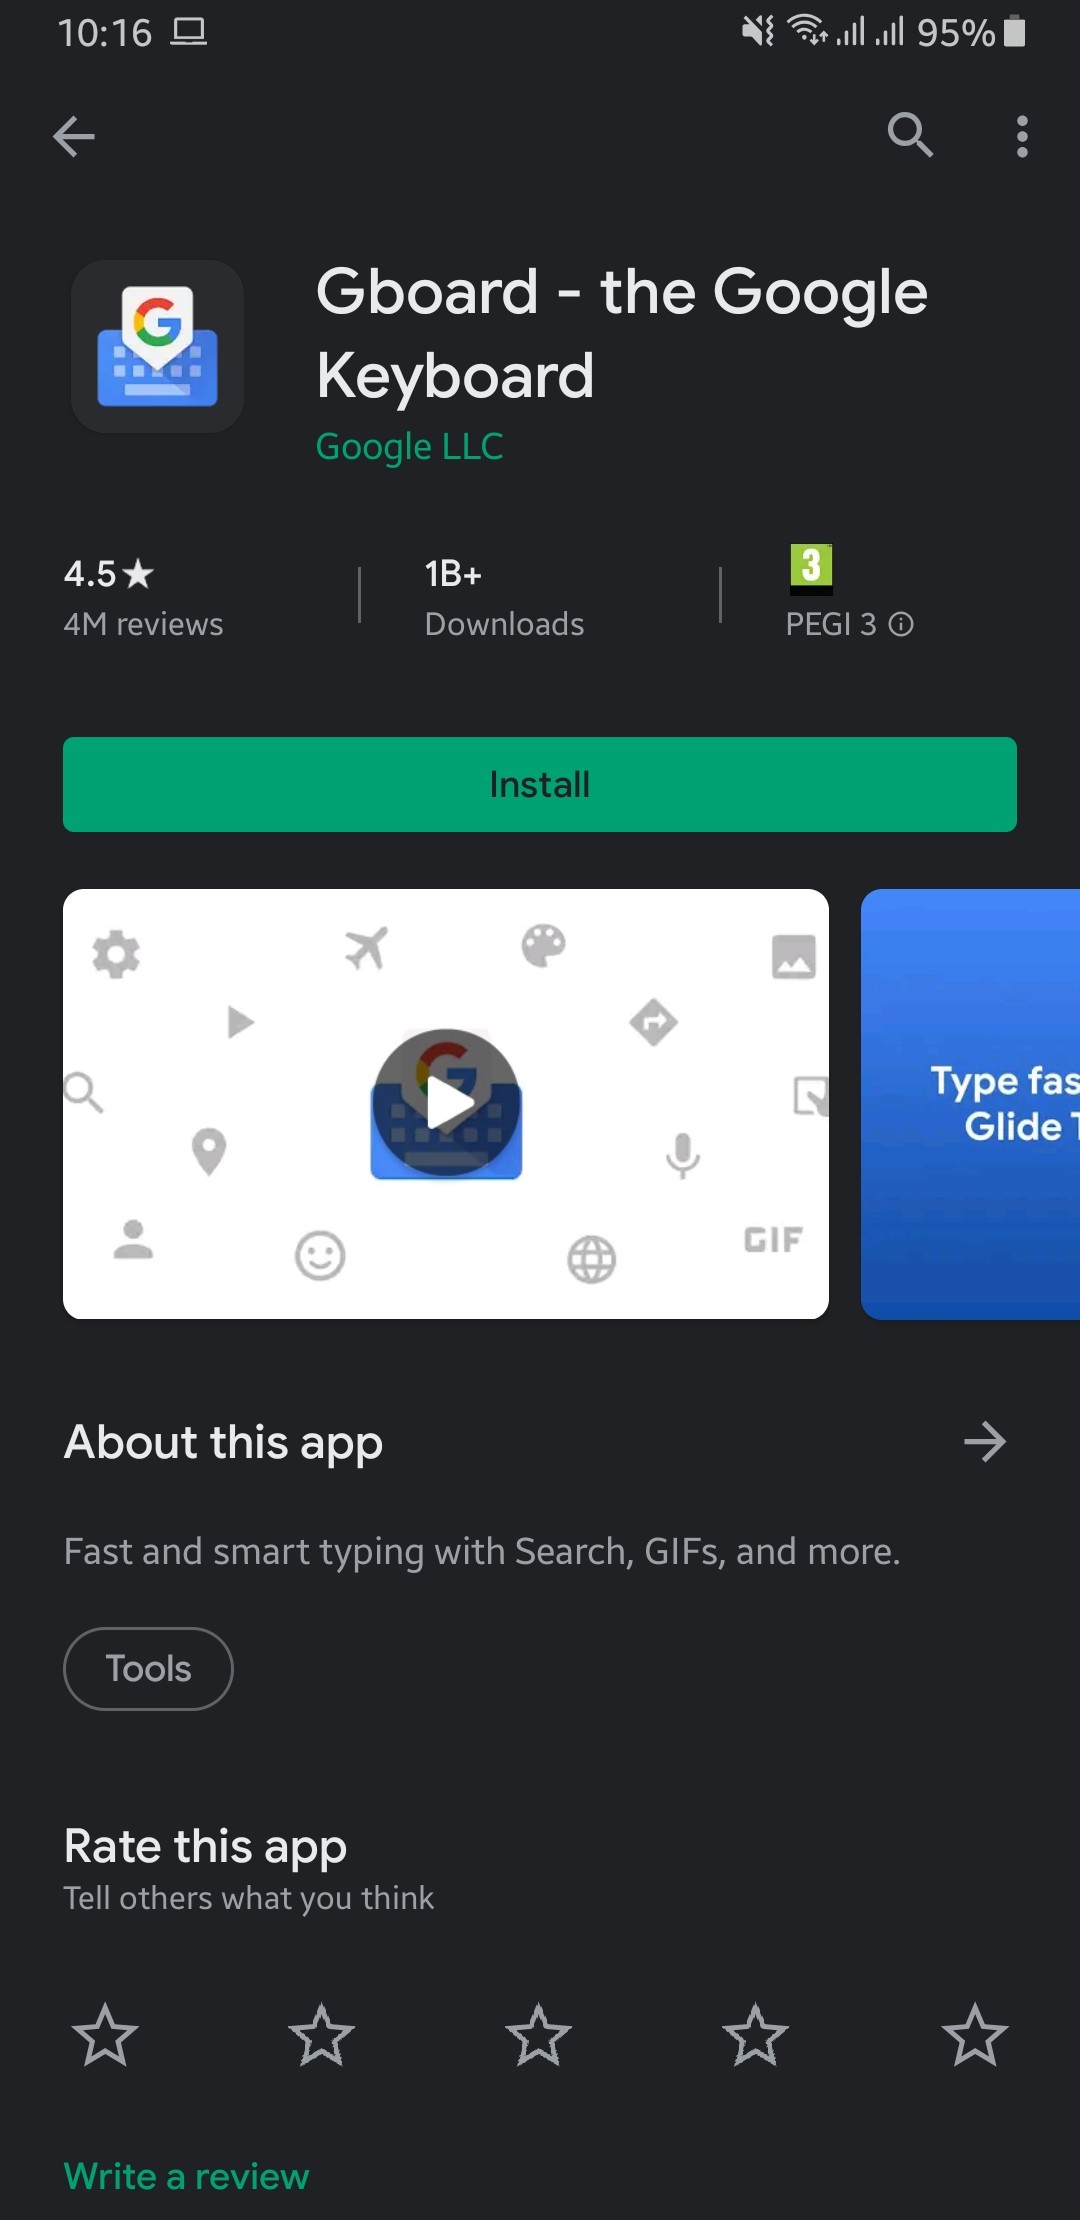
Step 1: Launch the Google Play Store and go for “My apps and games”.
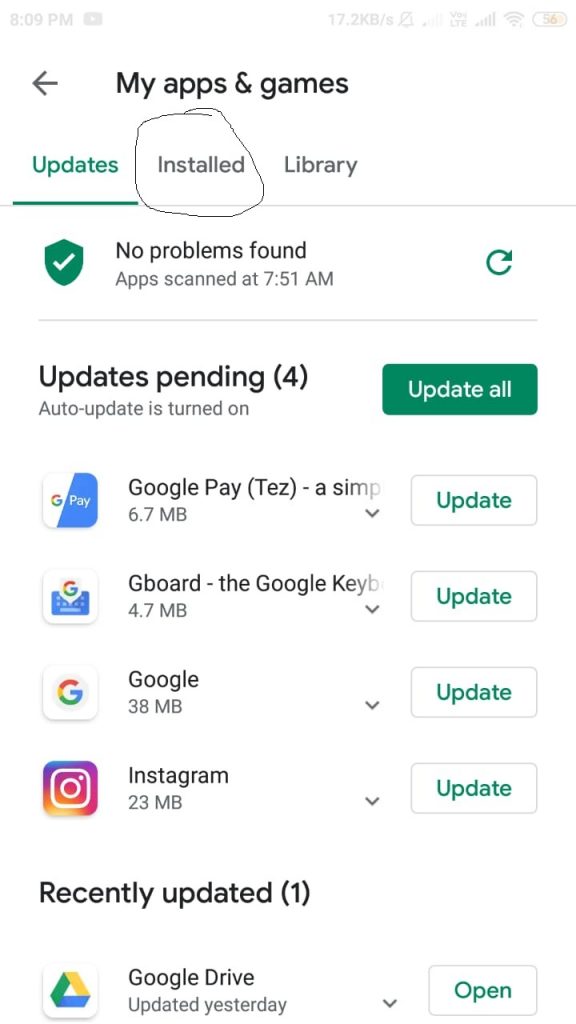
Step 2: Afterwards, the “Update page” will open and you will observe a record of all your apps that need updates.

Step 3: Click on “Updates” button adjacent to Gboard. It might happen that Gboard will not appear in the update list that means it is previously updated.
2. To update the Android
Step 1: Open the “Settings” and click on “About phone”.
Step 2: Then select “System updates”. If the system required the updates, then the updates option will be present on the screen.
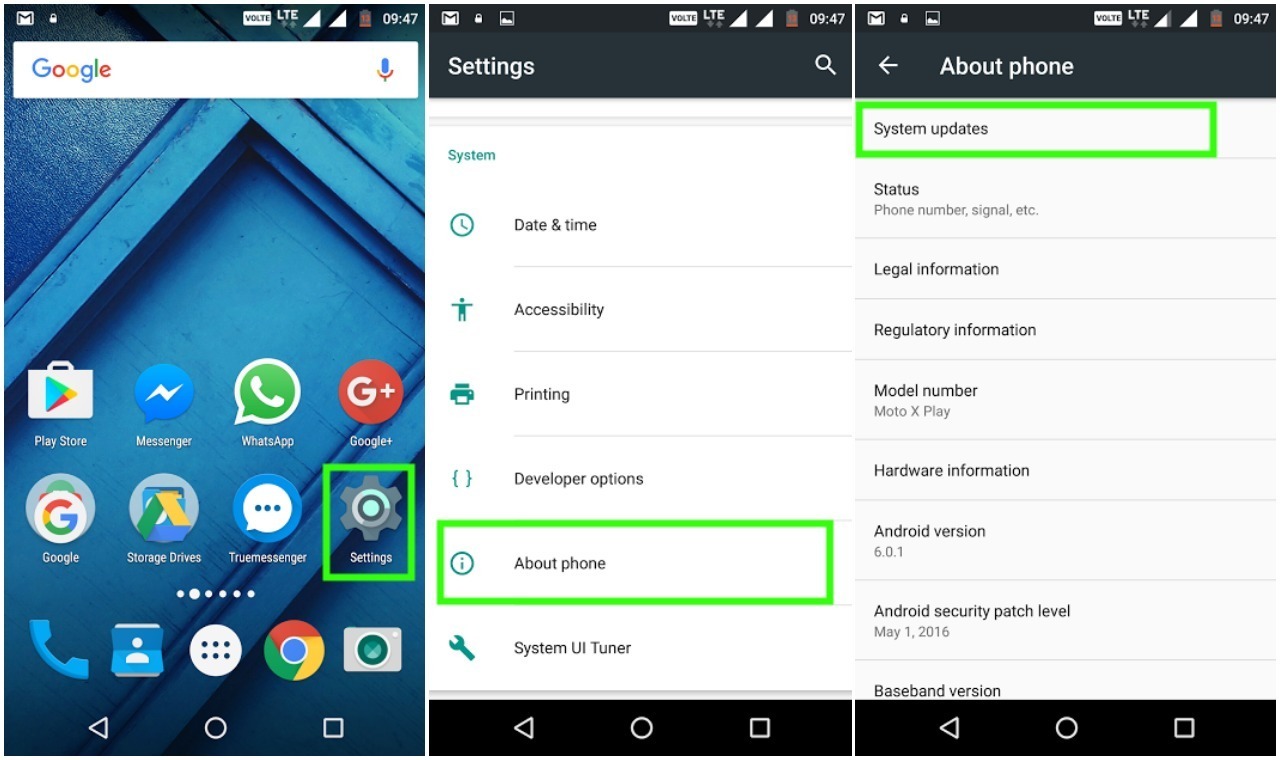
Step 3: Click on “Install now” option, and consequently, your phone will reboot automatically.
6. Uninstall the Gboard app and then reinstall it-
If not a single method is working, then you can undoubtedly uninstall the Gboard app and afterwards reinstall it from the Google Play Store. This results in clearing all your data and files link to it. If any troublesome files remain there, then it will be automatically get detached.
Step 1: Install the other keyboard app from the play store in case you have only Gboard.
Step 2: After installing the app, adjust the settings. In the first place, go to “Settings” and then click on “Languages & input”.
Step 3: Select the ” Virtual keyboard” or “Current keyboard” option and then go for “Manage keyboard”.
Step 4: Flip the button for the newly installed keyboard.
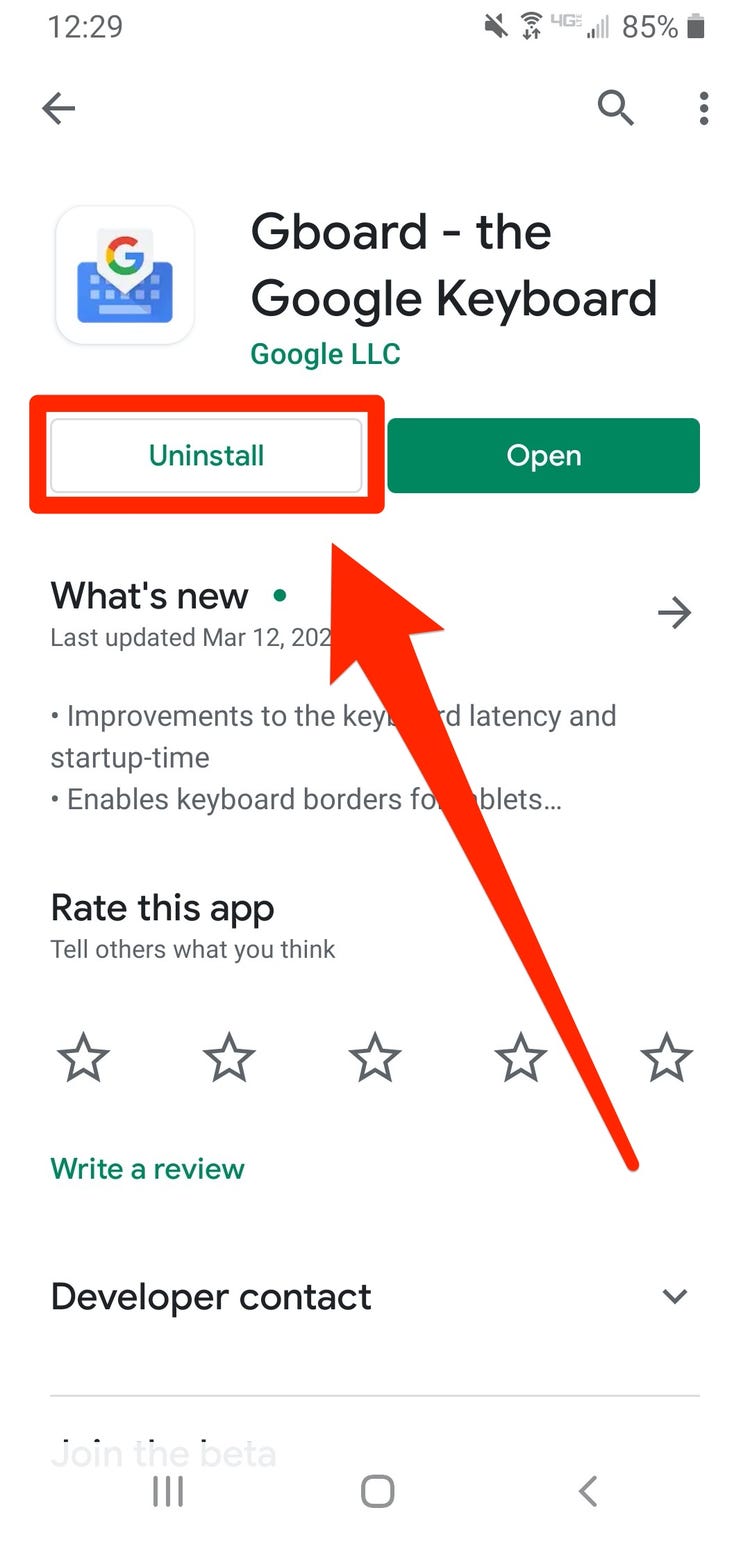
Step 5: Go back to “Settings” and click on Gboard & hit on “Apps and notifications”.
Step 6: Tap the “Uninstall” button to delete the app from your device. Open the Google Play Store, look for Gboard and install it once again.
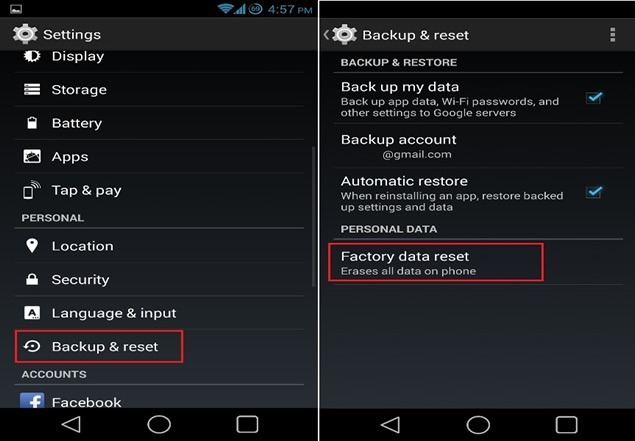
7. Factory reset
If none of the above options is working, then only go for the reset option. Before going ahead, make sure to form a backup to protect all important data & files.
Step 1: Firstly, go to “Settings” and then to “Additional settings”.
Step 2: Select “Backup and reset” & click on “erase all data” or “factory reset” option.
Step 3: It might ask for your password to finish off the process.
Step 4: After completing the process, reinstall the Gboard app.
Different Methods To Fix Gboard Keeps Stopping Error For iOS
Variant approach to fix Gboard stopping error for iPhone & iPad
1. Add Gboard in your keyboard list
When you upgrade the Gboard, then it might get vanished from your keyboard list. To bring it back follow these steps-
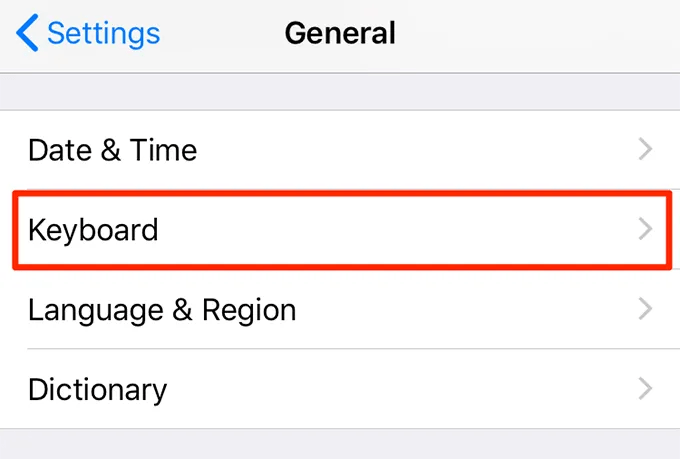
Step 1: Go into your “iPhone settings” and tap “General”.
Step 2: Afterwards, click on the “Keyboard” and again click on “Keyboard” option.
Step 3: Hit the “Add a new keyboard” button and select the Gboard to fix the error.
2. Fix “null” next to Gboard
When you upgrade your latest version of Gboard, you can observe the “null” option adjacent to Gboard. To debug the error, first & foremost delete the Gboard from your keyboard list & then bring it back again.
Step 1: Open the “Settings” option.
Step 2: Tap on “General” and afterwards select the “Keyboard” option.
Step 3: Once again click on “Keyboard”.

Step 4: Then, at the right-hand side of upper section tap on “Edit”. Subsequently, tap “Delete” button to eliminate the keyboard. 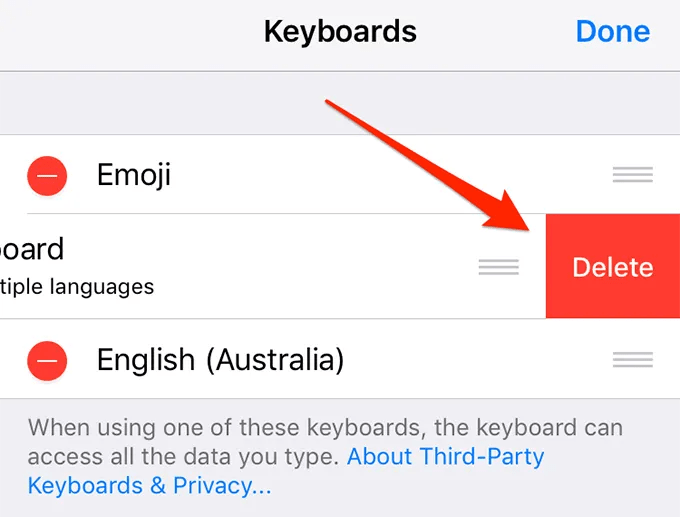
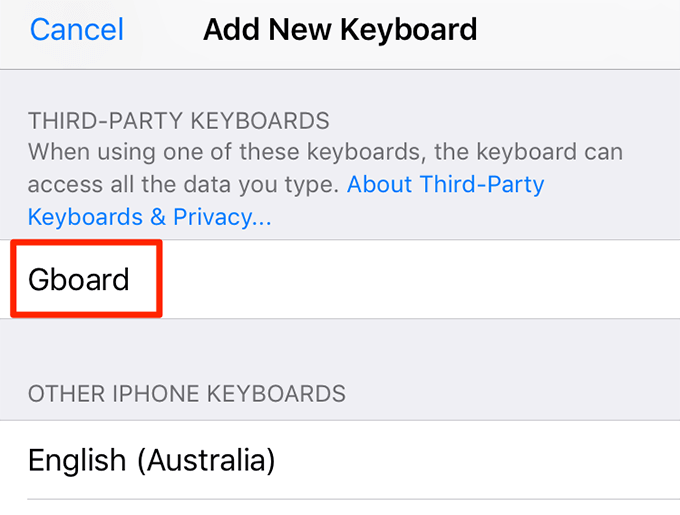
Step 5: Click on “Add new keyboard”.

Step 6: And then select the Gboard from the given list.If it does not fix the error, then try to reboot your iPhone or iPad.
 3. Update Gboard on iPhone manually
Step 1: Launch the “App Store”.
Step 2: Then click on the “Today” option in the lower section of your screen.
Step 3: Select the profile icon and search for Gboard.
Step 4: Check if any update needed for the app. If yes, then click on the “Updates” button to install the remaining updates.
4. Uninstall the app & then reinstall it
Step 1: Select and hold the Gboard app present on the home screen.
Srep 2: Go for “Edit home screen” and tap cross (x) icon on the app to delete it.
![]()
Step 3: Select the “Delete” button to uninstall the Gboard.
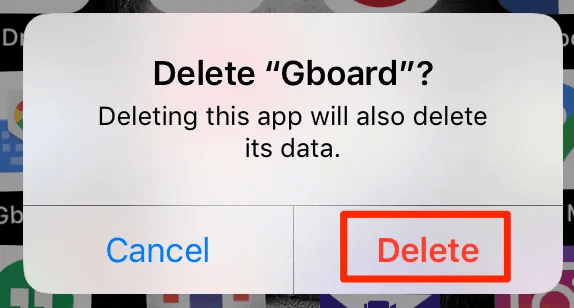
Step 4: At last, open the app store and click on the “Install” button to bring back the Gboard app.
5. Factory reset
Step 1: Launch “Settings” & go for “General”.
Step 2: Select “Backup & Reset” button & go for “Factory data reset” or “Erase all content and settings” but make sure to backup your data and files in iCloud so that your data and files remain safe.
Step 3: It will ask you a passcode and Apple ID password to confirm the activity.

Step 4: Leave the device for a few minutes so that the device can reboot along with “Factory default settings”.
Step 5: At last, reinstall your Gboard from App Store and enjoy it.

Final Words
All these methods are most frequently usable tricks which turned out to be useful to fix the Gboard error. It is a manageable error that can be settle without doing any significant modification in your phone. I hope so, by using these methods, you have fixed the error.
If you find this post fruitful and helpful, then let us know in the comments section below. In case of any queries share your issue with us we will try to resolve it.


